

Gozynta Mobius 3.1 Feature Release

QuickBooks Online has a feature for receiving receipts that makes it easier for you to categorize them and have transactions ready and waiting when you run your bank feeds. However, you still have to manually forward each invoice to QuickBooks, and setting up automatic forwarding for Gmail is a pretty problematic affair .
First, why is this a problem?
There are two obstacles to receipt forwarding to QuickBooks Online from Gmail.
Pretty complicated, huh? You will need a solution that won’t require us to verify the recipient address, and will let us change the "From" address of the forwarded email. Lukily, I have just the solution for you! You can accomplish both of these with Google App Scripts.
I took a hybrid approach here rather than pure Google Scripts. There isn’t a way to trigger a script immediately when new emails are received, so my script polls every hour, so I use Gmail filters to move the emails that I want to process out of my inbox to a tag. This gets the emails out of my inbox immediately (I never see them) and means all the configuration happens in Gmail. The downside is that I end up with a long list of filters, and I can’t put comments to remind myself what each one is for.
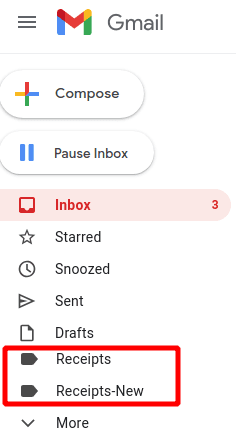
Create two tags in your Gmail. Go ahead and name these Receipts and Receipts-New. In this process we will set up our filters to move emails into Receipts-New, and then when our script has finished processing them it will move them into Receipts.
Make note of the email address that QuickBooks provides you. That will become our destinationEmail in the next step.
You can see my version of this script here.
function processInbox() {
   let userEmail = Session.getActiveUser().getEmail().toLowerCase();
   var newreceiptsLabel = GmailApp.getUserLabelByName('receipts-new');
   var receiptsLabel = GmailApp.getUserLabelByName('receipts');
   const destinationEmail = "something@qbodocs.com"
   console.log(`Running as ${userEmail}`);

   var threads = newreceiptsLabel.getThreads();
   for (var i = 0; i < threads.length; i++) {
      var curThread = threads[i];
      // get all messages in a given thread
      var messages = curThread.getMessages();
      for (var j = 0; j < messages.length; j++) {
         var message = messages[j];
         if (!message.getFrom().toLowerCase().includes('<' + userEmail + '>')) {
            console.log(`From: ${message.getFrom()} Subject: ${message.getSubject()} Date: ${message.getDate()}`);
            message.forward(destinationEmail, {from: userEmail});
            message.markRead();
         }
      }
      curThread.addLabel(receiptsLabel);
      curThread.removeLabel(newreceiptsLabel);
   }
}
destinationEmail in the code to match the address that QuickBooks gave you.Show "appsscript.json" manifest file in editor.appscript.json file:{
"timeZone": "America/New_York",
"dependencies": {
"enabledAdvancedServices": [
{
"userSymbol": "Gmail",
"serviceId": "gmail",
"version": "v1"
}
]
},
"exceptionLogging": "STACKDRIVER",
"runtimeVersion": "V8",
"oauthScopes": [
"https://www.googleapis.com/auth/userinfo.email",
"https://www.googleapis.com/auth/gmail.modify",
"https://mail.google.com/"
]
}
Code.gs file in the Editor again, and click the Run button at the top. The first time you run the script
you will be asked to give it permissions to access your Gmail account. You'll need to Allow access.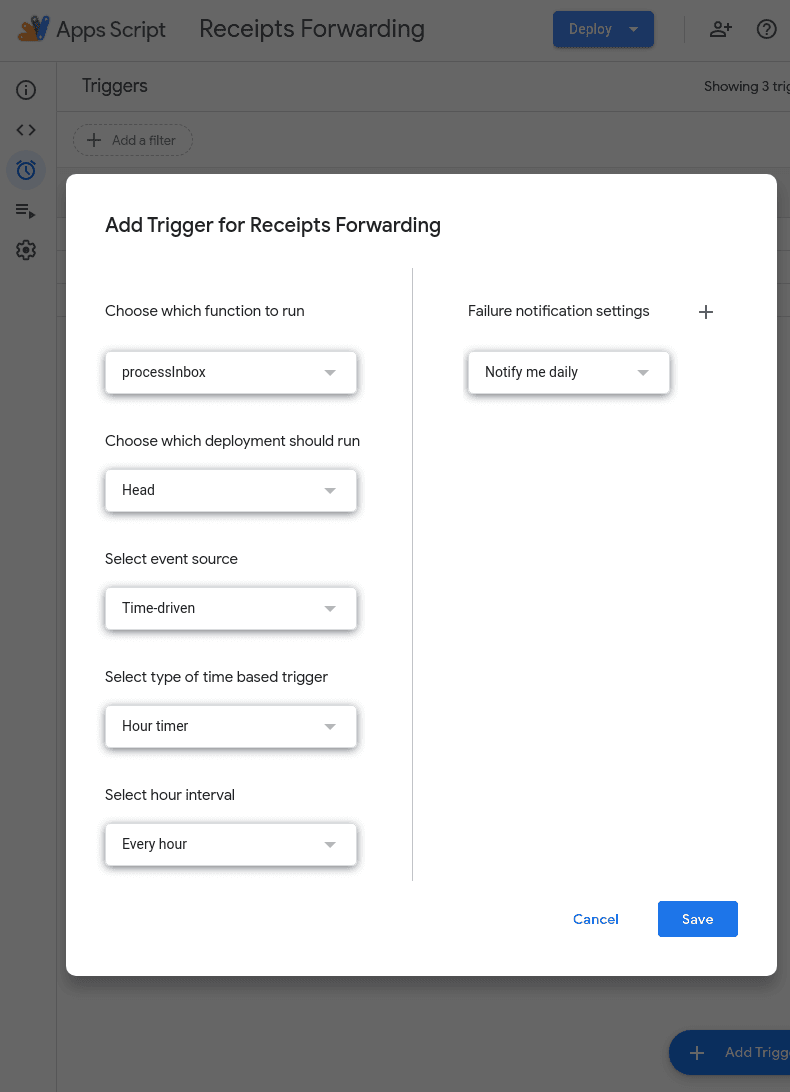
The Executions section will show you each time this script has run, and you can view the logs of each execution to see what emails were processed and look for any errors.
Phew! Now the hard part is done. The only thing left is to get our emails into the right tag.
I recommend making your filters as specific as possible. This will help ensure that you don't send any garbage (including scam invoices) to QuickBooks.
If possible include the from address, any parts of the subject that don't change, and the amount (if it's in the email body and doesn't change month-to-month).
We can use this invoice email as an example:
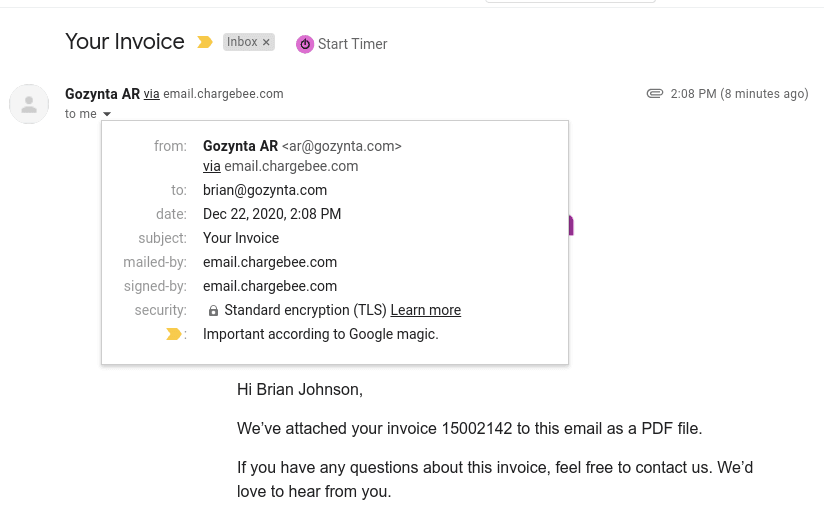
We'll search for emails that match this subject and from address. We put the subject in quotes so that Gmail looks for
that exact phrasing. If the subject was "Invoice number 123 from Gozynta" then I'd put "Invoice number" "from Gozynta"
in the search box to make the match as close as possible.
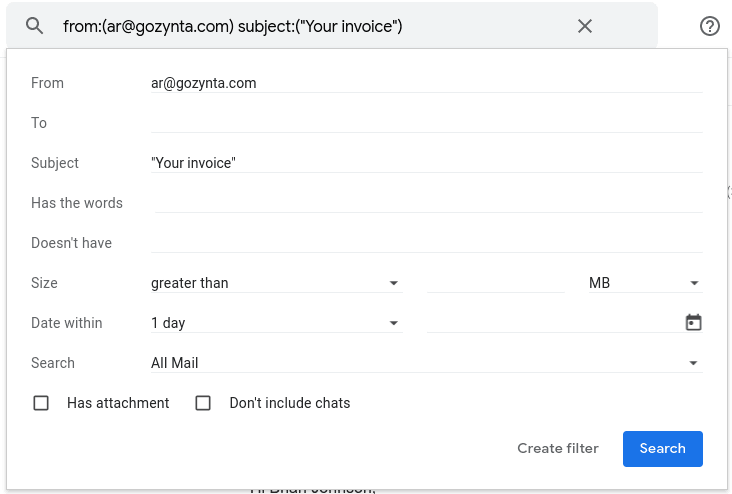
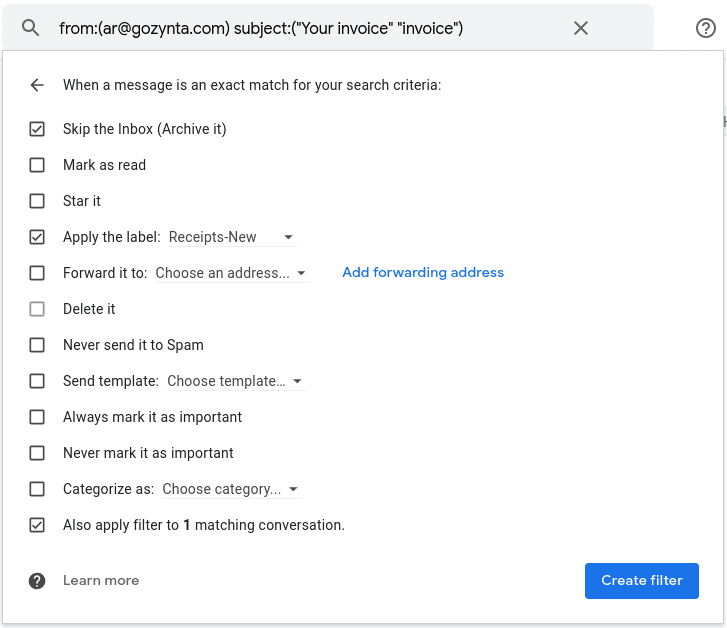
Click the Create Filter button. Set the filter to "Skip the inbox", Apply the label "Recipts-New", and apply to the
matching conversation. Then click Create Filter.
As you receive other recurring invoice emails, do this with each of them. After your first month you'll be able to enjoy a much cleaner inbox!

